Creating Sessions for an Organization
You can create Public or Private sessions for an organization and do the following actions:
- Assign the session to the respective mentor.
- Invite mentees to the session.
- Add the session information such as the session topic and schedule.
- Add the meeting platform.
To create a session, do as follows:
Do one of the following actions:
- Select Workspace from the Application menu.
- Go to the Application menu
 and select Workspace.
On the Workspace page, click Manage session.
Click Create session. The Create a new session page appears.
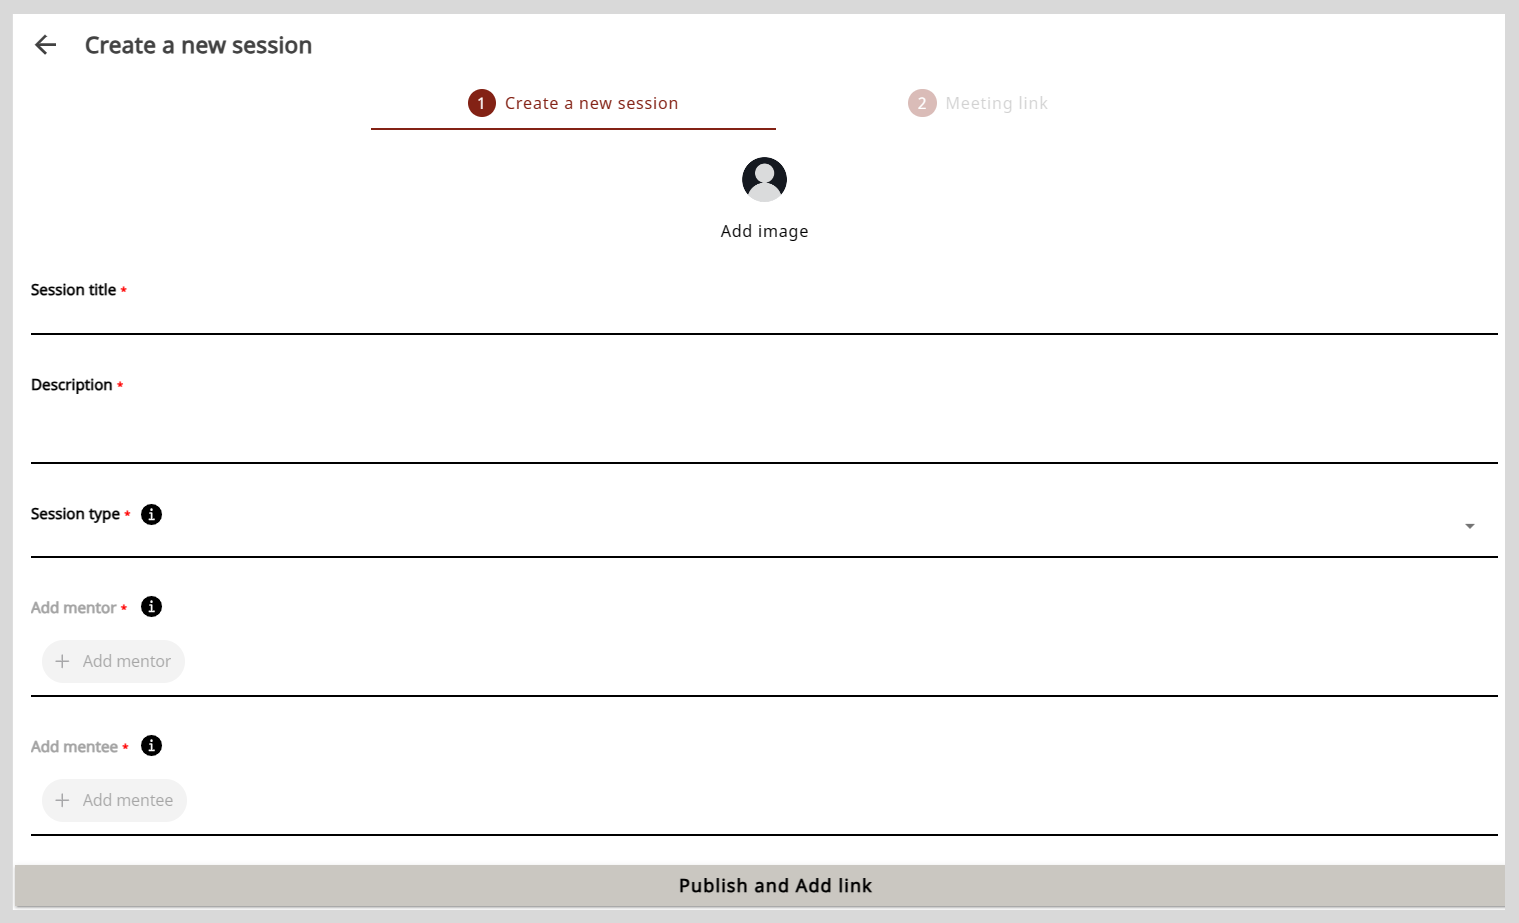
Optionally, to add a session image, click Add image and do one of the following actions:
- To take a picture, select Take Photo.
- To upload an image, select Choose from library.tip
Select an image that is relevant to the session topic.
Enter the session information in the Session title and Description boxes.
To select the type of session, do as follows:
- Click the Session type box.
- Select the session type from the Session type dropdown and click Ok.
noteYou cannot change the session type after publishing the session.
To assign the session to a mentor, do as follows:
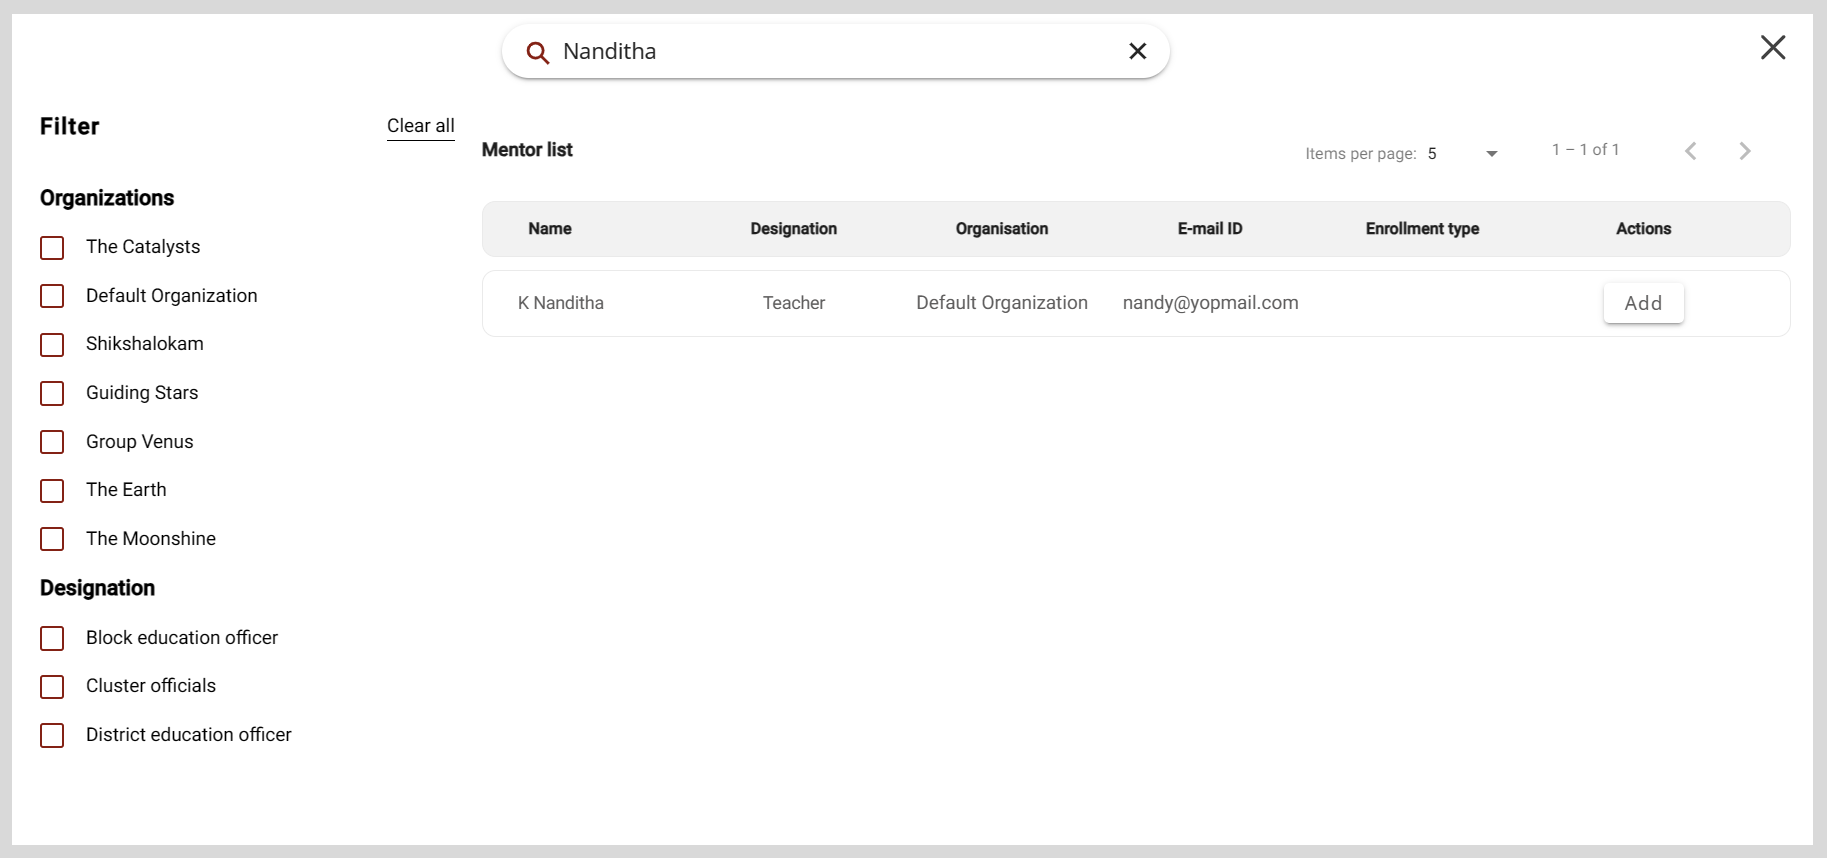
Click + Add mentor. The Mentor list window appears.
Find a mentor from the list and click Add.
tipTo assign the session to a different mentor, do as follows:
- In the + Add mentor box, click the mentor's name was previously selected.
- Find a new mentor and click Add.
noteAfter publishing the session, you cannot assign the session to a different mentor.
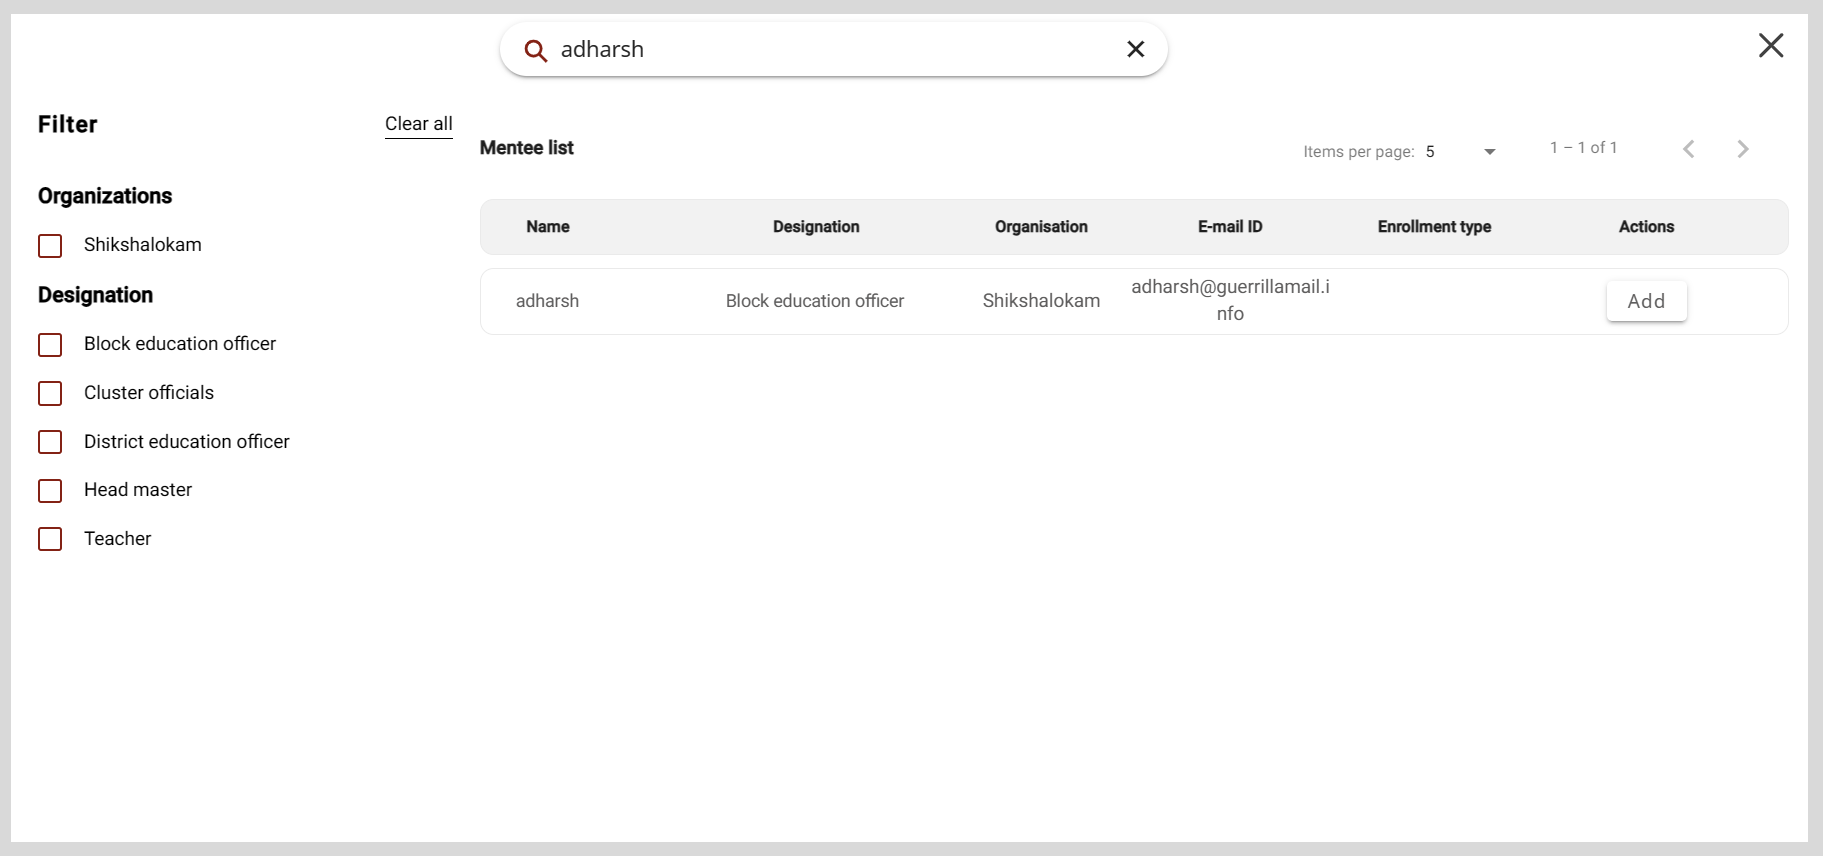
tipFrom the Mentor or Mentee list window, you can find users by:
- Searching for the user in the Search box.
- Using filters such as the user's organization or designation.
- Changing the number of users listed on the page using the Items per page dropdown.
To invite mentees, do as follows:
Click + Add mentee. The Mentee list window appears.
Find a mentee from the list and click Add.
tipIt is optional to invite mentees to a Public session.
noteYou cannot add mentees after the session enrollment limit is reached. If you add new mentees after this limit is reached, a session seats full message appears.
To schedule a session, do as follows:
- Click the Start date and End date boxes.
- Select the date and time from the date and time picker.
- Click
 .
.
noteThe session duration should be at least 30 minutes.
Select an option from the following boxes:
- Recommended for
- Categories
- Medium
tip- To cancel the selection, click the option again.
- To add a new option, do as follows:
- Click + Add and enter the new option.
- Click Ok.
- To select all the options, turn on the toggle.
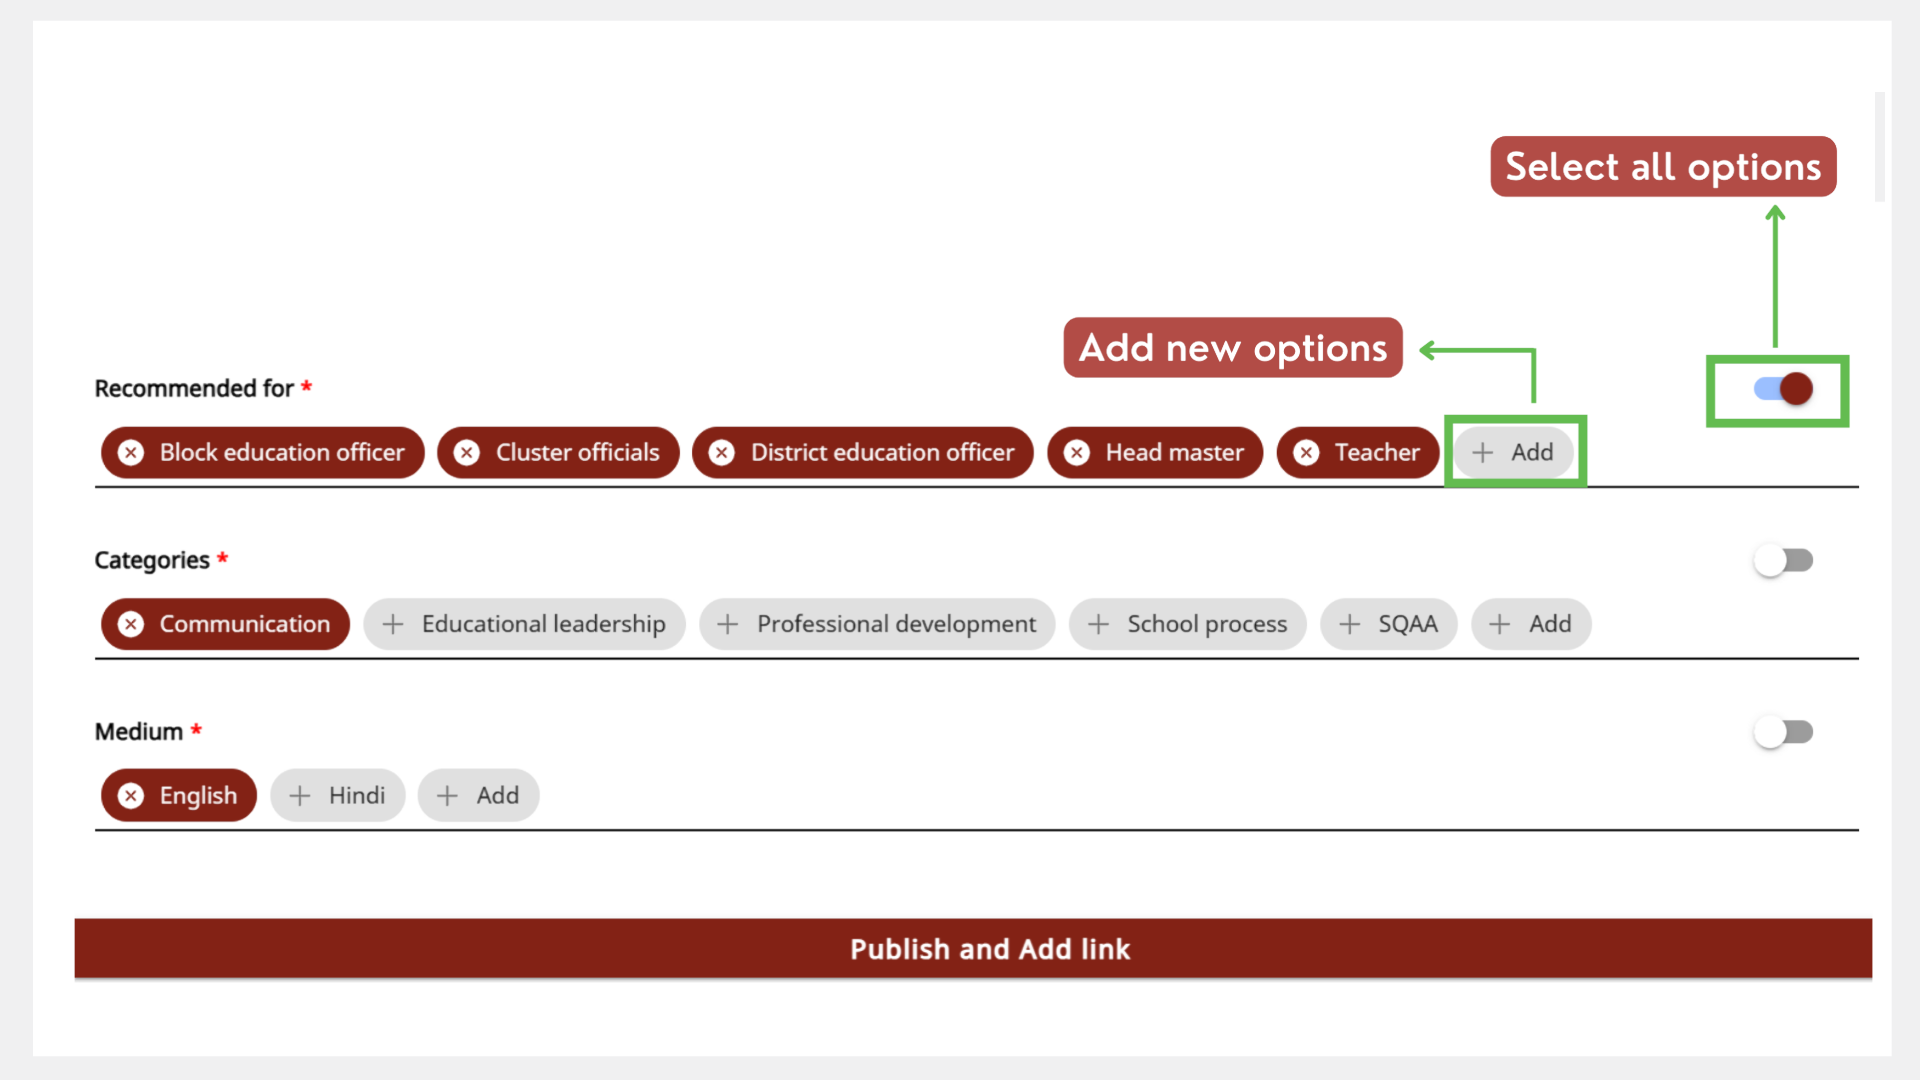
Click Publish and add link. The session is published on the platform and participants can now view your session.
noteYou must set the meeting platform on the Meeting Link tab.
 tip
tipTo go back and edit the session details, do as follows:
- Go to the Edit session tab.
- Make the necessary changes and click Save.
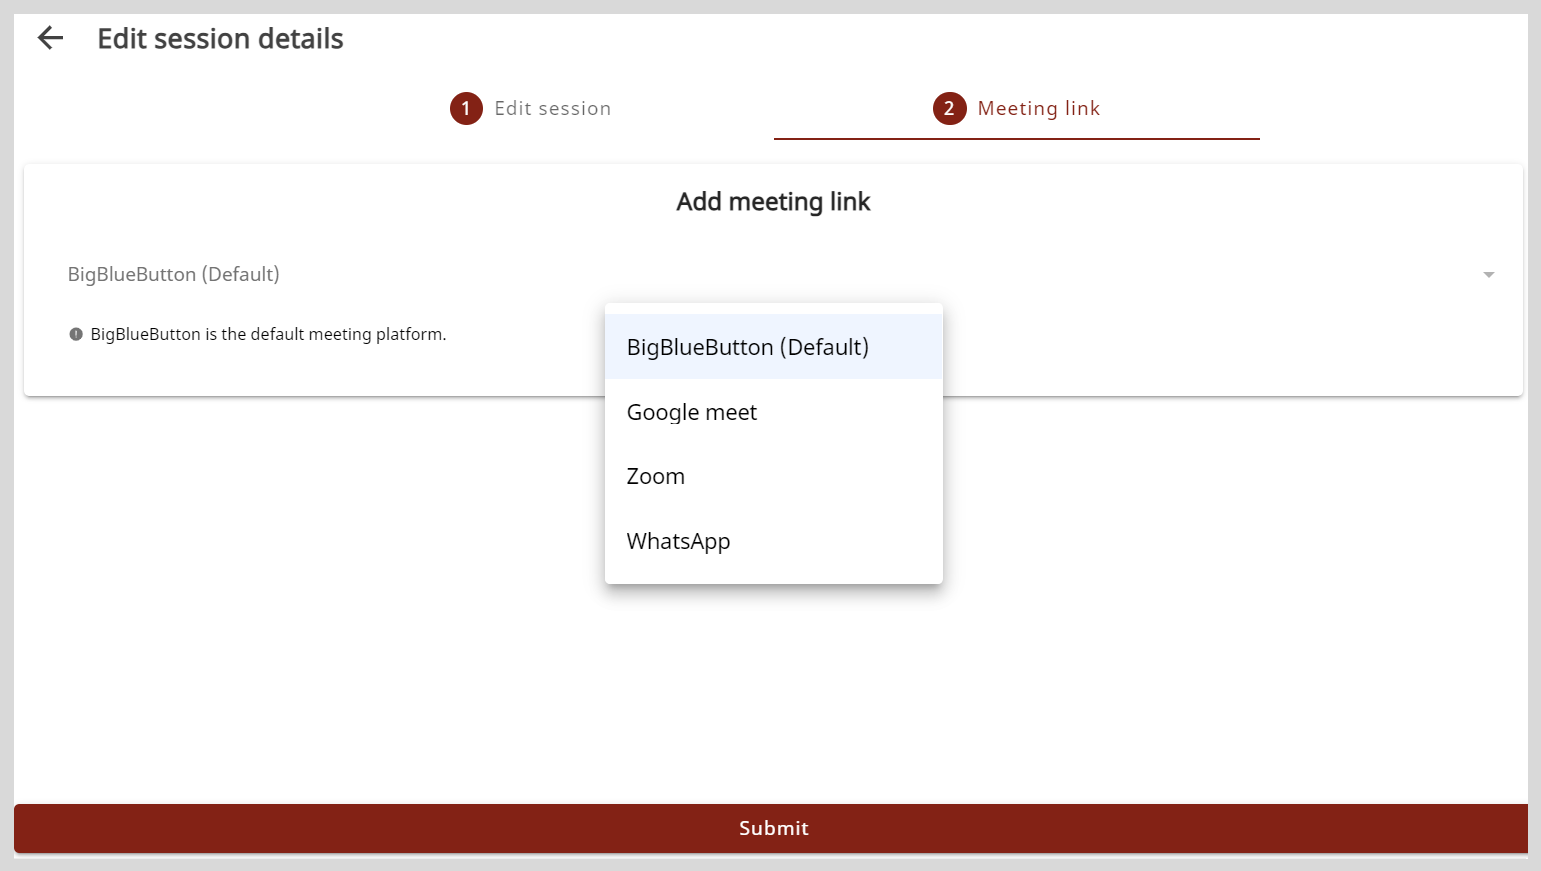
On the Meeting link tab, select a meeting platform from the Add meeting link menu.
noteIf you haven't selected a meeting platform, BigBlueButton is set as the default platform.
Meeting Platform Meeting Information BigBlueButton No action required. Google Meet Copy and paste the call link in the Meet link box. WhatsApp Copy and paste the call link in the WhatsApp box. Zoom Do the following actions:
- Copy and paste the meeting link in the Zoom link box.
- Copy and paste the meeting ID in the Meeting ID box.
- Copy and paste the passcode in the Passcode box.
Click Submit. The meeting information is added.
tipYou can find the sessions that are assigned to mentors and track their progress on the Session list section.